
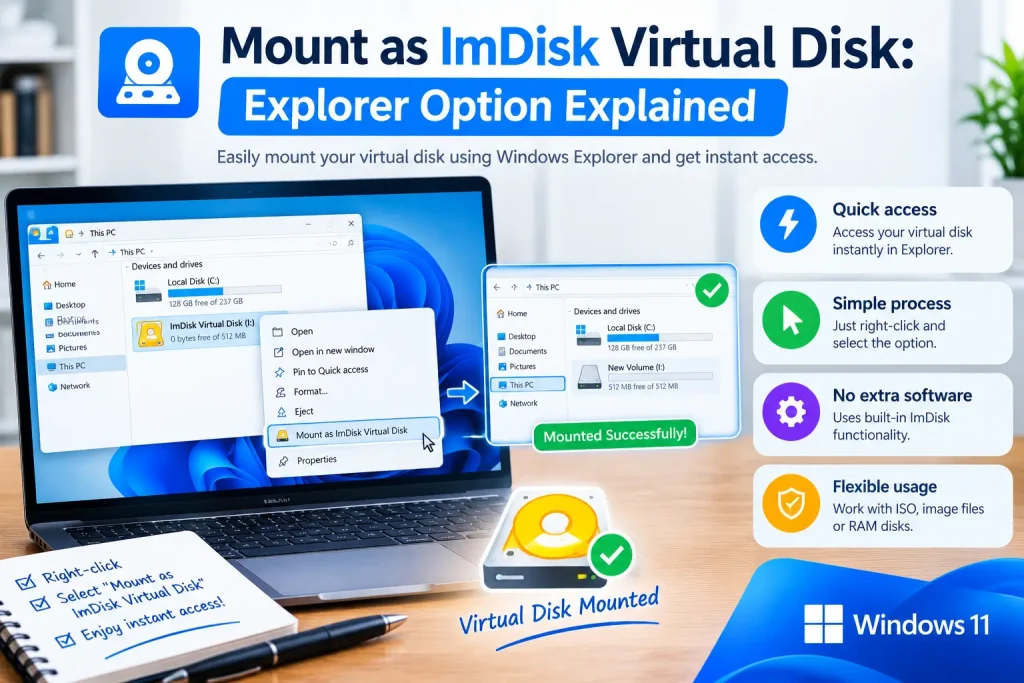
If you installed ImDisk and noticed a Windows Explorer option called “Mount as ImDisk Virtual Disk,” you are looking at one of the easiest ways to mount a disk image without using the command line.
The option adds a graphical shortcut to File Explorer so you can right-click a supported image file, mount it as a virtual disk, assign a drive letter, and access its contents through Windows.
This guide explains how the Mount as ImDisk Virtual Disk context-menu option works, what kinds of image files it can help with, how to mount safely, what read-only mode means, and how to fix common problems when the option is missing or the image does not mount correctly.
What Does “Mount as ImDisk Virtual Disk” Mean?
“Mount as ImDisk Virtual Disk” is a Windows Explorer context-menu command added by the ImDisk installation.
It lets you attach a disk image as a virtual device without manually typing an imdisk.exe command.
In simple terms:
- You right-click a disk image.
- You choose Mount as ImDisk Virtual Disk.
- ImDisk opens a mount dialog.
- You select options such as drive letter and access mode.
- Windows presents the mounted image as a virtual drive.
If the image contains a filesystem Windows understands, you can usually open the new drive in File Explorer and browse its files.
How the Explorer Context Menu Works
The ImDisk installer registers shell integration with Windows Explorer.
That integration can add commands such as:
- Mount as ImDisk Virtual Disk
- Unmount ImDisk Virtual Disk
- Save disk contents as image file
These commands are shortcuts to ImDisk’s underlying driver and control components.
The graphical menu does not replace ImDisk itself.
It simply gives you an easier way to use the same virtual disk functionality.
This distinction is important:
The Explorer option is an interface. The ImDisk driver is the component actually creating the virtual device.
How to Mount a Disk Image With ImDisk
The basic process is straightforward.
Step 1: Find the Disk Image
Open File Explorer and browse to the image file you want to mount.
Examples may include files such as:
.img.raw.iso- or other compatible image types depending on your setup.
Not every image format is handled in exactly the same way, so compatibility can vary.
Step 2: Right-Click the Image
Right-click the file.
If Explorer integration is installed correctly, you may see:
Mount as ImDisk Virtual Disk
Select it.
Step 3: Choose Mount Options
The ImDisk mount dialog may let you choose options such as:
- drive letter,
- device type,
- offset,
- read-only mode,
- removable-media behavior,
- and image access settings.
For a simple image, the default settings may be enough.
Step 4: Assign a Drive Letter
Choose an unused drive letter such as:
V:R:X:
The specific letter does not matter as long as it is free.
Step 5: Mount the Image
Confirm the settings.
If the image is valid and the filesystem is compatible with Windows, the new virtual drive should appear in File Explorer.
What Happens After You Mount an Image?
Once mounted, Windows treats the image contents like a virtual storage volume.
You may be able to:
- browse folders,
- open files,
- copy files,
- run compatible applications,
- inspect archived data,
- or work with the image as if it were a normal drive.
The exact behavior depends on whether the image is mounted read-only or read/write.
Read-Only vs Read/Write Mounting
This is one of the most important settings to understand.
Read-Only
Read-only mode prevents changes to the original image.
Use read-only when:
- examining backups,
- inspecting archived disk images,
- working with forensic images,
- opening unknown images,
- or when you do not want accidental modifications.
Read-only is the safer choice when your goal is only to inspect files.
Read/Write
Read/write mode allows changes to the mounted image.
That means Windows or applications may modify:
- file contents,
- timestamps,
- metadata,
- filesystem structures,
- or free-space information.
Only use read/write mode when you intend to change the image.
Why Read-Only Mode Is Safer
Disk images can contain important or irreplaceable data.
If you mount an image read/write, even seemingly harmless actions may alter it.
For example, Windows may update metadata or create hidden system files depending on the filesystem and configuration.
Read-only mode helps preserve the original image exactly as it was.
For archival, recovery, or forensic work, this is often the better option.
Mounting an Image With imdisk.exe
The Explorer context menu is convenient, but the same task can also be done from the command line.
For example:
imdisk -a -f "C:\Images\disk.img" -m V:This mounts the image as drive V:.
To mount read-only:
imdisk -a -f "C:\Images\disk.img" -m V: -o roThe context-menu option is essentially a graphical shortcut for this kind of operation.
What Image Formats Can ImDisk Mount?
The answer depends on the image layout and the tools installed.
Core ImDisk works best with images that can be presented directly as a virtual volume.
Common scenarios include:
- raw disk images,
- IMG files,
- floppy images,
- optical-style images,
- simple volume images.
ImDisk Toolkit can expand the workflow with support for additional formats through supporting components.
Historically, Toolkit documentation has referenced formats such as:
- VHD
- VDI
- VMDK
- ISO
- BIN
- NRG
- DMG
- SDI
- RAW/IMG
However, it is important not to assume that every format is natively interpreted by the core ImDisk driver itself.
Some formats need extra handling or conversion.
What If the Image Contains a Partition Table?
This is one of the most common reasons an image fails to mount correctly.
Some image files contain a single filesystem volume.
Others contain an entire physical disk layout, including:
- MBR or GPT partition table,
- multiple partitions,
- boot sectors,
- and unused space.
If the image contains a full disk, the filesystem may not begin at byte zero.
That means ImDisk may need a partition offset before Windows can see the actual filesystem.
If you mount the image incorrectly, Windows may say:
- the disk is unformatted,
- the filesystem is unknown,
- or the volume cannot be opened.
Do not immediately format the image.
That warning may simply mean the wrong offset is being used.
What Is a Disk Image Offset?
An offset tells ImDisk where inside the image the actual filesystem begins.
For example, a full disk image might contain:
- partition table first,
- then a partition starting later,
- then the filesystem.
If you mount the entire image as though the filesystem begins at the first byte, Windows may not recognize it.
Advanced users can specify offsets with command-line options.
If you are unsure, work from a backup copy and inspect the image structure before changing settings.
Why Does Windows Ask Me to Format the Mounted Image?
This message can mean two very different things.
Case 1: The Image Is Actually Empty
If you created a blank virtual disk, formatting may be expected.
Case 2: The Image Contains Data but Is Mounted Incorrectly
If the image should already contain files, do not format it.
Possible causes include:
- wrong partition offset,
- unsupported filesystem,
- full-disk image mounted as a single volume,
- corrupted image,
- unsupported image format.
Formatting could destroy data.
Can ImDisk Mount ISO Files?
ImDisk can work with optical-media-style images, but modern Windows also includes built-in ISO mounting.
If your only goal is to open a normal ISO file, Windows Explorer may already provide a native Mount option.
ImDisk becomes more useful when you need:
- specialized virtual disk behavior,
- image formats beyond normal ISO use,
- read-only controls,
- RAM-backed storage,
- or scriptable virtual volume management.
So for a simple ISO, Windows’ built-in option may be easier.
ImDisk Mount vs Windows Built-In Mount
| Feature | ImDisk | Windows Built-In Mount |
|---|---|---|
| ISO mounting | Yes, depending on setup | Yes |
| RAW/IMG workflows | More flexible | Limited |
| RAM disk support | Yes | No |
| Command-line virtual disk control | Yes | Limited |
| Read-only options | Yes | Depends on format |
| Advanced offsets | Yes | No |
| Full-disk emulation | Limited | No |
Use the simplest tool that fits the job.
How to Unmount an ImDisk Virtual Disk
When you finish using the image, unmount it cleanly.
You may be able to:
- Right-click the mounted ImDisk drive.
- Choose Unmount ImDisk Virtual Disk.
Or use the command line:
imdisk -D -m V:Replace V: with the correct drive letter.
Before unmounting, close any files or programs using the virtual drive.
Why Won’t the ImDisk Virtual Disk Unmount?
Windows may refuse to remove the volume if a file is still open.
Possible causes include:
- File Explorer window open on the drive,
- Command Prompt currently using that drive,
- media player accessing a file,
- antivirus scan,
- indexing service,
- application with an open document.
Close the relevant programs and try again.
Avoid force-removing the drive unless necessary, because interrupted writes can corrupt data.
Why Is “Mount as ImDisk Virtual Disk” Missing?
If the context-menu option does not appear, several things may be wrong.
ImDisk Explorer Integration Was Not Installed
The shell integration may not have been registered.
Reinstalling the official package may restore it.
Explorer Has Not Refreshed
Restart File Explorer or sign out and back in.
Windows Version Behavior
Newer Windows releases may display context-menu entries differently.
On Windows 11, older shell extensions can appear under:
Show more options
Right-click the file and check there.
File Type Is Not Registered
Some context-menu handlers only appear for certain file extensions or file classes.
Installation Is Incomplete
The core driver may be installed while Explorer integration is missing.
A repair or reinstall can help.
Windows 11 Context Menu and ImDisk
Windows 11 changed the File Explorer right-click menu.
Some older application commands do not appear in the first compact menu.
If you do not see Mount as ImDisk Virtual Disk immediately:
- Right-click the image.
- Choose Show more options.
- Look for the ImDisk entry in the classic context menu.
This is often the first thing to check before assuming the integration is broken.
How to Restore the ImDisk Context Menu
If the option is missing completely:
- Confirm ImDisk is installed.
- Reinstall using the official package.
- Allow Explorer integration during setup.
- Restart File Explorer.
- Restart Windows if necessary.
- Check Show more options on Windows 11.
If the command still does not appear, verify that the relevant ImDisk Control Panel and shell components are installed.
Can You Add “Mount as ImDisk Virtual Disk” Manually?
Advanced users can technically create custom Explorer context-menu entries through the Windows Registry.
However, this is not recommended for most users.
A broken registry command can:
- point to the wrong executable,
- fail to pass the filename correctly,
- create duplicate menu items,
- or stop working after updates.
Using the official installer is safer.
What Does “Save Disk Contents as Image File” Do?
ImDisk Explorer integration can also include a command for saving the contents of a virtual disk to an image file.
This can be useful for:
- creating a backup image,
- preserving a virtual disk,
- saving a RAM disk before shutdown,
- or copying a virtual volume into an image file.
Remember that the result is only as consistent as the source volume.
If applications are actively writing to the disk, the image may not represent a clean snapshot.
Can You Mount an Image From a Network Drive?
Sometimes, but network-backed images can introduce extra complications.
Potential issues include:
- permissions,
- connection loss,
- latency,
- file locking,
- and service access rights.
For important work, a local copy is often safer.
If a network connection drops while the image is mounted read/write, there is a higher risk of corruption.
Can You Mount an Image From an External USB Drive?
Yes, provided Windows can access the image file normally.
However, do not unplug the USB drive while the image is mounted.
If the backing image disappears unexpectedly, the mounted virtual volume may become unusable and unsaved data may be lost.
Can You Mount the Same Image Twice?
Technically possible in some configurations, but it can be dangerous if both mounts allow writing.
Two writable mounts of the same filesystem image can cause corruption because each instance may assume it has exclusive control.
If you need multiple views of the same image, use read-only mode.
Can You Run Programs From a Mounted ImDisk Volume?
Yes, in many cases.
However, application behavior depends on:
- Windows version,
- security requirements,
- whether the program needs elevation,
- and whether it expects physical-disk behavior.
Windows 11 24H2 has a documented ImDisk-related limitation involving executables that require administrative elevation from an ImDisk volume.
If an elevated program fails, copy it to a normal local drive and test again.
Is Mounting a Disk Image Safe?
Yes, when done carefully.
The main risks are:
- writing to an image accidentally,
- mounting the wrong offset,
- formatting an image that only appears unreadable,
- malware inside the image,
- or using an untrusted image file.
Read-only mounting reduces some of these risks but does not make potentially malicious files safe to execute.
Treat files inside unknown disk images with the same caution as downloaded files.
Can a Mountexd Image Contain Malware?
Yes.
A disk image is just a container for files and filesystems.
It can contain:
- malicious executables,
- infected documents,
- scripts,
- autorun files,
- or other unsafe content.
Mounting the image itself is not the same as executing malware, but opening or running files inside it can create risk.
Scan unknown images or extracted files with trusted security software.
Best Practices for Mounting Disk Images
Follow these habits:
- Keep a backup of important images.
- Use read-only mode when you only need to inspect files.
- Avoid formatting an image unless you know it is blank.
- Close applications before unmounting.
- Do not mount the same image writable in multiple places.
- Scan unknown images for malware.
- Verify image format and structure.
- Use trusted ImDisk packages.
- Test unfamiliar images on non-critical systems.
- Use a full-disk tool when the image requires physical-disk emulation.
ImDisk Volume Mounting vs Full Disk Emulation
This distinction matters.
ImDisk primarily creates virtual volumes.
A full disk emulator presents a complete disk device with partitions and physical-disk-style characteristics.
This affects applications such as:
- forensic tools,
- backup software,
- partition managers,
- disk-management utilities,
- and applications that enumerate physical storage devices.
If a program cannot detect an ImDisk-mounted image, the problem may not be the image.
The application may require full-disk emulation.
When Should You Use Arsenal Image Mounter Instead?
Consider a full-disk tool such as Arsenal Image Mounter when:
- the image contains a complex partition layout,
- the application expects a physical disk,
- ImDisk volume mounting is not recognized,
- you need better modern Windows compatibility,
- or full-disk behavior is required.
ImDisk is often ideal for direct volume mounting.
It is not always the right tool for every disk image.
Common Problems and Fixes
“Mount as ImDisk Virtual Disk” Does Not Appear
Check Show more options on Windows 11, then verify that Explorer integration is installed.
Mounted Drive Is Empty
Check whether the image contains the expected filesystem and whether the correct offset is used.
Windows Says “You Need to Format the Disk”
Do not format if the image should contain data. Check the image structure first.
Drive Letter Is Missing
Assign a free drive letter during the mount process.
Image Mounts but Cannot Be Written
It may be mounted read-only, or the backing file may not be writable.
Image Will Not Unmount
Close applications and Explorer windows using the drive.
Application Cannot See the Drive
The application may require a physical-disk-style device rather than an ImDisk volume.
Frequently Asked Questions
What does “Mount as ImDisk Virtual Disk” do?
It mounts a compatible disk image as a virtual Windows drive using the ImDisk driver.
Where is “Mount as ImDisk Virtual Disk” in Windows 11?
It may appear under the classic context menu. Right-click the image and choose Show more options.
Do I need ImDisk Toolkit for the context-menu option?
Not necessarily. The core ImDisk installation can include Explorer integration.
Can ImDisk mount IMG files?
Yes, many raw or IMG-style images can be mounted, depending on their layout and filesystem.
Can ImDisk mount ISO files?
It can work with optical-image scenarios, although Windows already has built-in ISO mounting for normal use.
Is read-only mounting safer?
Yes. Read-only mode prevents accidental changes to the image and is recommended when you only need to inspect files.
Why does Windows ask me to format the mounted image?
The image may be blank, unsupported, or mounted with the wrong offset. If it should contain data, do not format it until you understand why Windows cannot read it.
How do I unmount an ImDisk virtual disk?
Use the Explorer unmount option or:
imdisk -D -m V:Can I mount a disk image from a USB drive?
Yes, but do not remove the USB device while the image is mounted.
Can I run programs from an ImDisk-mounted image?
Often yes, but compatibility depends on Windows and the application. Some elevated programs can have issues on newer Windows versions.
Is mounting an image the same as extracting it?
No. Mounting exposes the image as a virtual drive. Extracting copies files out of the image into a normal folder.
Is ImDisk a full physical disk emulator?
No. ImDisk primarily provides virtual volumes. Some advanced applications require a full-disk emulator instead.
Final Thoughts
The Mount as ImDisk Virtual Disk option is one of the easiest ways to use ImDisk without learning command-line syntax.
For simple workflows, the process is straightforward:
- right-click the image,
- choose Mount as ImDisk Virtual Disk,
- select a drive letter,
- choose read-only if you only need to inspect the image,
- access the new drive in File Explorer,
- and unmount it cleanly when finished.
The most important rule is this:
If an image should already contain data and Windows asks you to format it, stop and verify the image layout before doing anything.
That single habit can prevent accidental data loss.
For ordinary image browsing, ImDisk’s Explorer integration is convenient and efficient. For complex full-disk images, partition-heavy layouts, or applications that require physical-disk behavior, a full-disk emulator may be a better choice.